Setup on WooCommerce
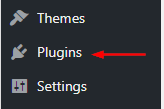
1 - Log into the WordPress admin area, then click on Plugins on the sidebar.
2 - Click on Add New on the top left.

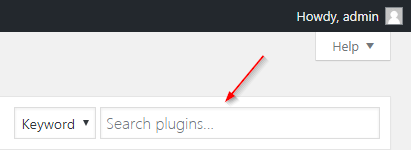
3 - In the top left, type Certegy Ezi-Pay in the Search plugins... search box then hit Enter.
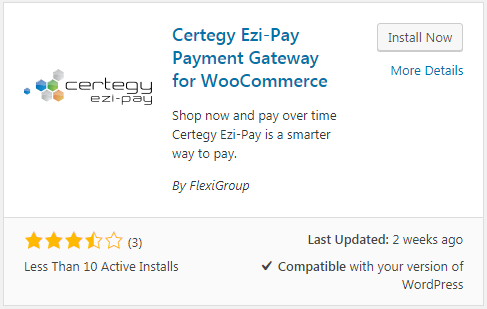
4 - From the search results, click on Install Now next to Certegy Ezi-Pay Payment Gateway for WooCommerce.
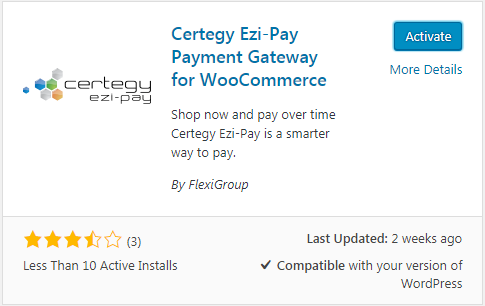
5 - Still on the same page and once installation is successful, you should see the Activate button. Click on it.
6 - This will re-direct you to Plugins page, confirm that Certegy Ezi-Pay is installed and activated.

Configuring Plugin
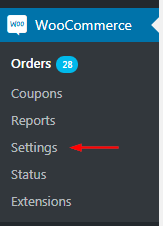
1 - From the side-bar, click on WooCommerce then on Settings.
2 - From the top bar, click on Checkout then on Certegy Ezi-Pay.

Below is a screenshot of the various Certegy Ezi-Pay settings available and what they are for.
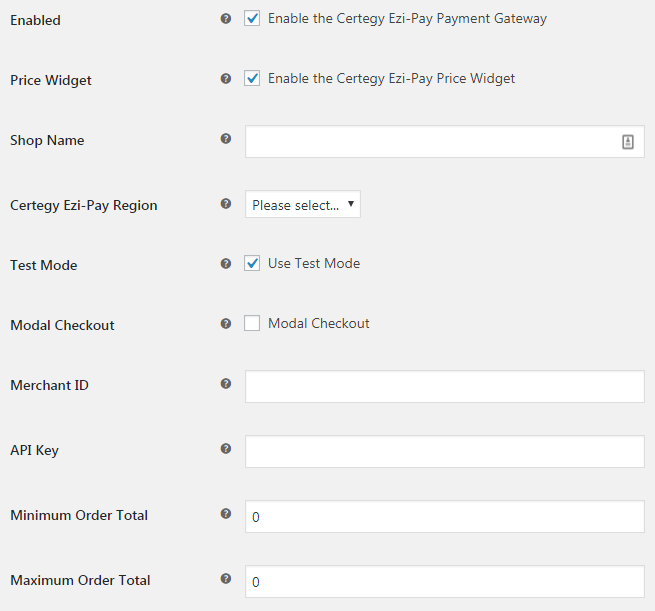
Enabled: Enables or disables Certegy Ezi-Pay
Price Widget: Displays an Certegy Ezi-Pay price widget on each of your store's product pages.
Shop Name: Your store name that will be displayed in WooCommerce email receipts to customers
Certegy Ezi-Pay Region: Region were your store is located as per your merchant agreement.
Test Mode: For troubleshooting of issues or testing of Certegy Ezi-Pay' user experience.
Modal Checkout: Completes transaction on your store for a more seamless experience.
Merchant ID: Provided to you as part of your welcome pack.
API Key: Provided to you by Platform Integration Team; used to verify orders from your store.
Minimum Order Total: Orders below that will not have Certegy Ezi-Pay as a payment option.
Maximum Order Total: Orders above that will not have Certegy Ezi-Pay as a payment option.